Submitted by JayShoe on
What tagging means, why tagging is important, and how tagging is done…
In the business of selling Jukebox Jockey Media Player software I often get asked questions surrounding media organization and tagging. In fact, the question is not exactly “how do I tag my media” but instead it’s usually something like the following.
- My media is coming up as “no artist”, “no title”, why is Jukebox Jockey broken and how can I fix it.
- I can’t find a particular song that I know I have in my media library. I can find it in any other software application like iTunes or Windows Media Player, but I can’t find it in Jukebox Jockey. Why not?
- In your advertisements on your website I see that all the songs have Cover Art, mine doesn’t have that. Why not?
- The software isn’t working in the way you advertise. I can’t search by genre or decade and all the songs are showing up strangely. What’s going on?
The answer to all of these questions is to organize your media. This article is intended to shed some light on what exactly it is that I mean.
Unorganized CD-R Collection Example
I’m going to use an analogy of a CD collection. Keep in mind that I'm using this as a fictional example and these physical discs represent a file. Let’s assume that I burnt a number of CD-R discs each with one song on each CD. What would that look like in the real world and what would that look like in the computer. Let’s look!
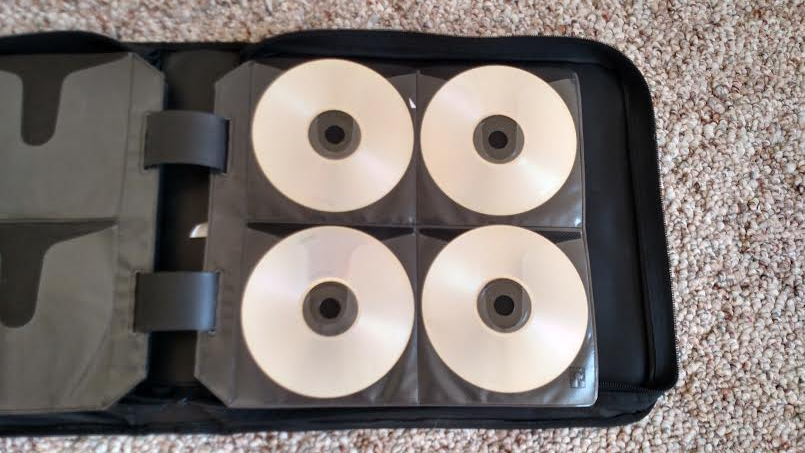
In the above example you’ll see 4 CD-R discs. Each disc represents a single song. I think this example is obvious, but let’s see what a computer would read if your media files were organized is such a cumbersome way.

Semi-Organized CD-R Collection
Some media libraries are somewhat organized. There is information on each disc that contains some description or some information. But overall the tracks don’t contain all that much information. Let’s see what that looks like.
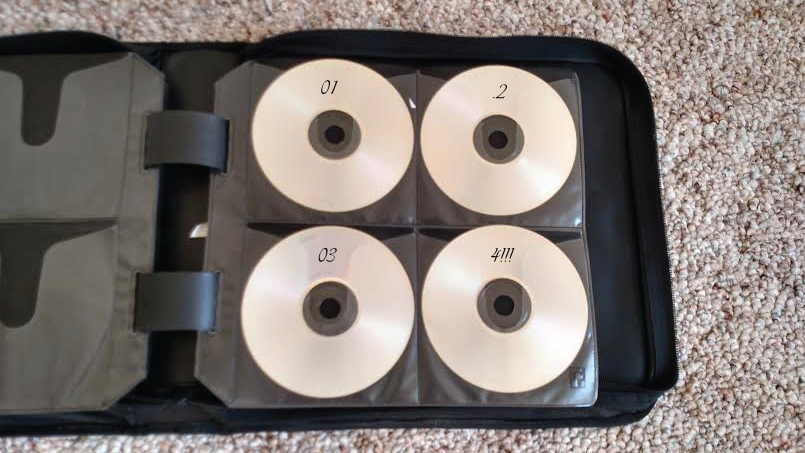
In the above example, you’ll see some numbers were put on the discs. This is far better of an organization method than not labeling the discs at all. At least if you were familiar with the tracks you could figure out which disc went to your favorite tune and you can find it. But for other users this method isn’t going to work very well because there is not much information on the disc. And the formatting of the numbers differ too. So let’s see what a computer sees when it reads the file equivalent of the above image.

Yes there is a little more information in the table, but not much. Also, take note about tracks 2 and 4. Since they do not follow the same format as the two other discs their labels get sloppy and aren’t easily read. Things still look really bad though inside the computer. So let’s try to get things a little more organized.
Organized CD-R Collection
In the following example the files are properly labeled. Remember, this is an example where each disc represents a single track. In this example, I've added labels to the CD-R that include the artist and title.
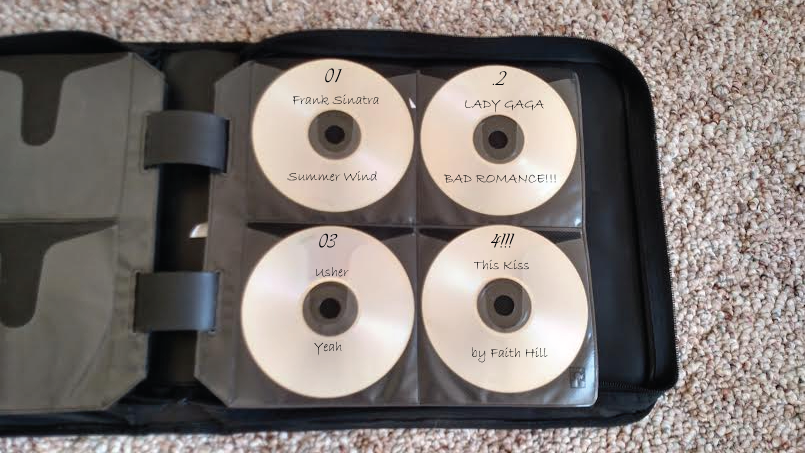
Great! Now we are getting somewhere. When I look at each disc (or track) I see that each song is labelled and I can pick out what song is what! Here is how a computer might see this.

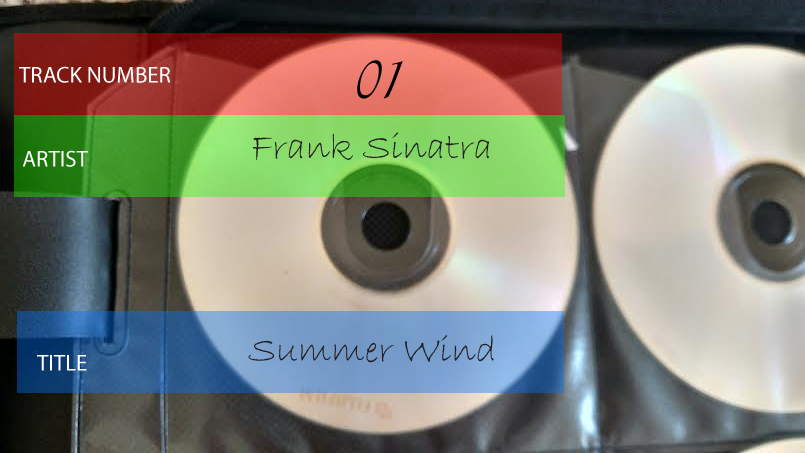
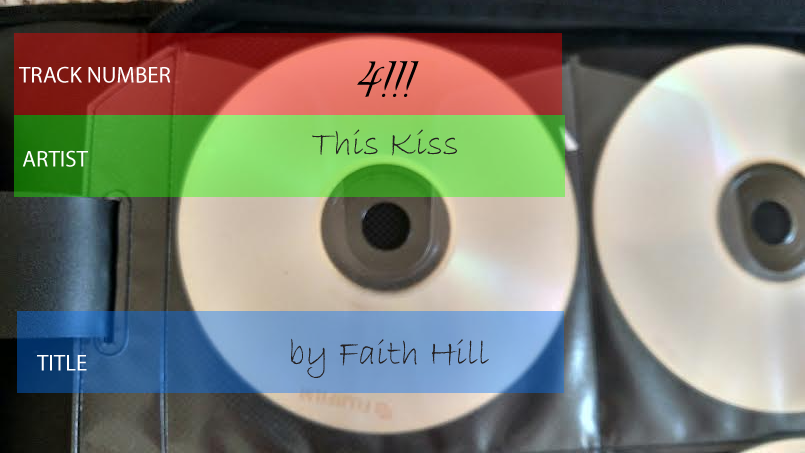
You might say, “Hold on a minute, not all the tracks look right inside the computer view”. For example Lady Gaga’s track comes up ALL CAPS and the Faith Hill song is mislabeled with the Title as the Artist and the Artist as the Title with a “by” in the beginning of it! So what happened? In this case, although each song is labeled they are all labeled with different formats. The computer has no way to determine whether or not you put in extra spaces, added extra words, or moved things around from Top to Bottom. In this fictional example, the computer is looking at each disc and determining the value for each track based on code that looks like this.
![]()
The above picture illustrates a very important theory we at Jukebox Jockey call “file masks”. The top section of the disc colored red describes the “Track Number”. The green section describes the “Artist” and the lower section describes the “Title”. Now let’s look at this labeling method when the labels are switched around a bit.
![]()
In the above image you will see that the Title and Artist fields are swapped. You see, the computer was told that the Artist is above the Title. So the computer will put the Artist information in the Title field and vice versa. The computer also doesn’t recognize that the labeling method is using the word “by” to describe the artist. So the computer is not only going to display it very explicitly, including the “by” in “by Faith Hill”. It's very important that whatever file naming mechanism you choose for your files, keep them all the same!
How File Masks work in Jukebox Jockey
In the above examples, we are making an analogy to a physical CD-R disc with marker labels on them. But of course, Jukebox Jockey is a computer program and it’s not going to use discs. It’s going to read files. So how does all this stuff translate into how Jukebox Jockey works? Let’s take a look…
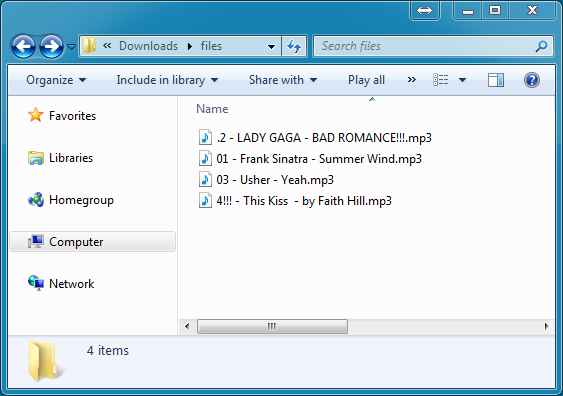
The above image illustrates the exact some 4 songs that we had on the CD-R discs. Each song contains the track number, the artist, and the title. 3 of the 4 tracks are organized in that order. So let’s assume that that is the organization method of this set of files. The file mask would have to pick out the information like this.
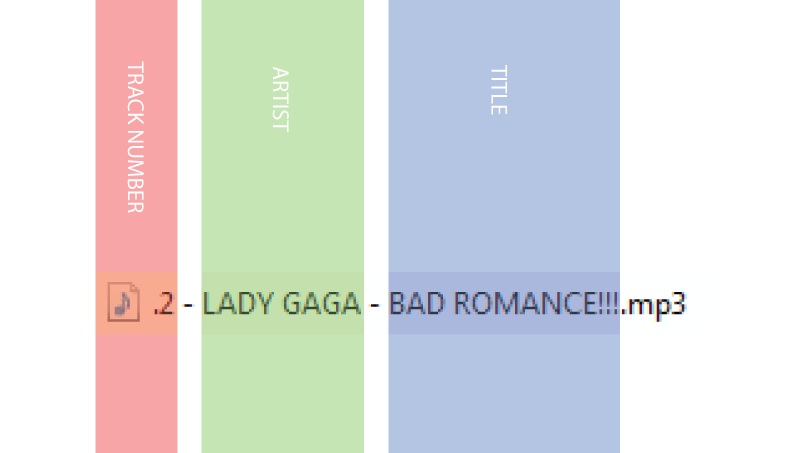
You’ll have to make a file mask that will tell the computer that you have a track number, followed by a dash, followed by an Artist, followed by a dash, followed by a title. In this case the separator for each field is a dash. To the computer, the separator is a “space, dash, space”. The combination of the spaces and the dashes all equal the separator for the file name. (IE “ – “). So here would be the file mask that would properly describe this file.
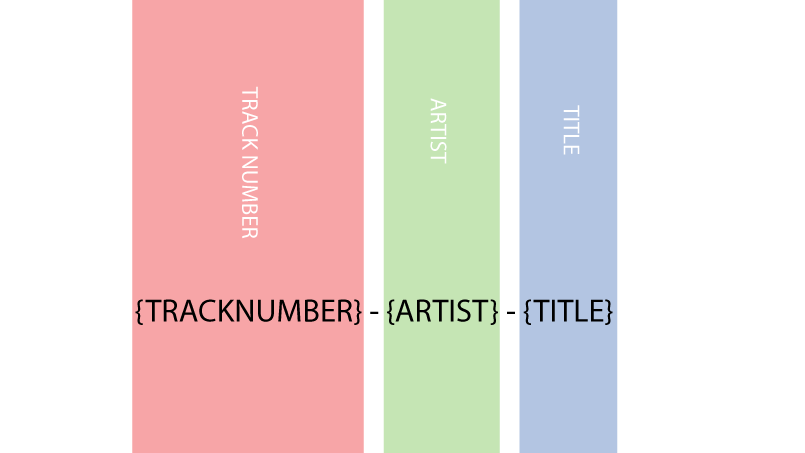
In the above image, we describe the file mask that would look like this.
{TRACKNUMBER} - {ARTIST} - {TITLE}
This would be put into the file mask list located in Jukebox Jockey's settings> Media Folder Configuration> File Masks
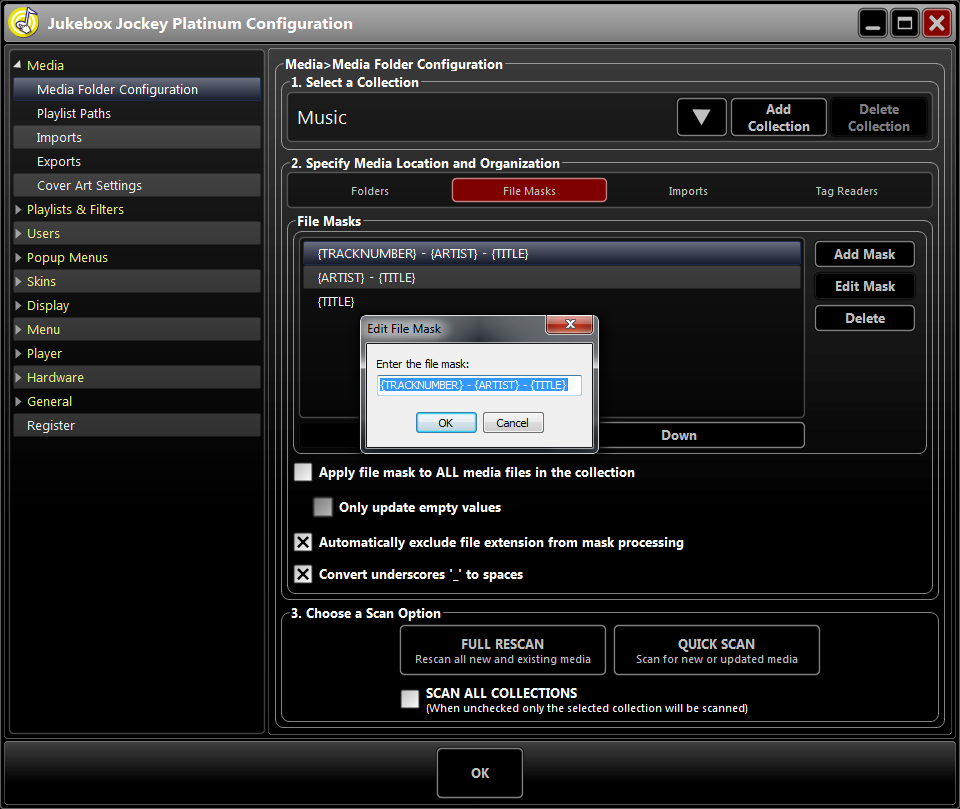
There are more advanced things you can do with file masks, for example you can retrieve data from the folder a file is located in by adding a “/” to the mask. On a basic level however, I think I have described the concept of a file mask and how it works. Using this file mask, the data would be imported into the software the same way as in the original example with CD-R discs.
What about the Genre, Decade, or Cover!!!???
So far I’ve explained how to use file masks to import the Track Number, Artist, and Title into Jukebox Jockey using file masks. We advertise that Jukebox Jockey can do so many other things like sort the media by decade, genre, or display cover art alongside the media. So what’s going on? Why isn't it working? The answer is to go a step further and organize your media with Tags.
Organizing Media with Tags
I’d like to go back to the CD-R example. Writing on the disc with a marker is analogous to having proper filenames for your media. Tagging your media can thus be compared to supplying a booklet or “label” with your media. Here is a graphic explaining what I mean.
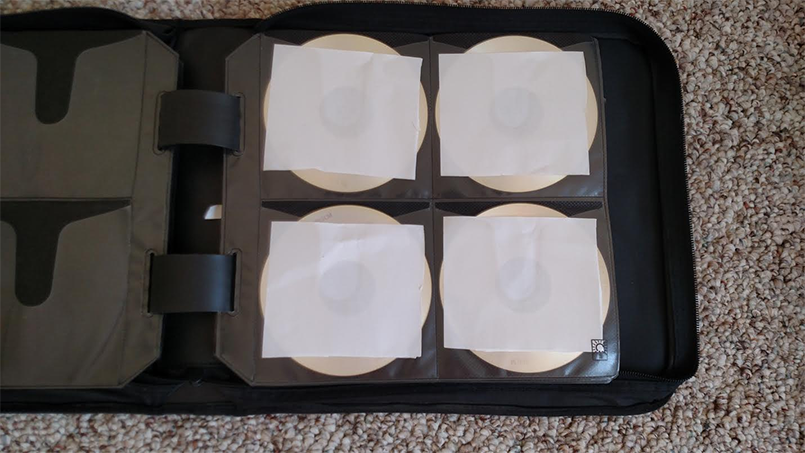
In the above example you see tags, but they are all blank!!! It’s not surprising that the computer would read these files like this.

Every media file contains a “tag”. Whether the file is Audio, Video, Karaoke, or whatever; each format has it’s own tagging mechanism. These standards have been well established all over the world and these tags are widely accepted by many software vendors. It’s not important that we go into the differences in tag formats for each file type (audio, video, karaoke, etc) but what it is important that you know is that these tagging methods exist and by using them you’ll have a better organized media library that will show up on your Jukebox Jockey machine the right way.
Here is what we want, Complete and Accurate Tags
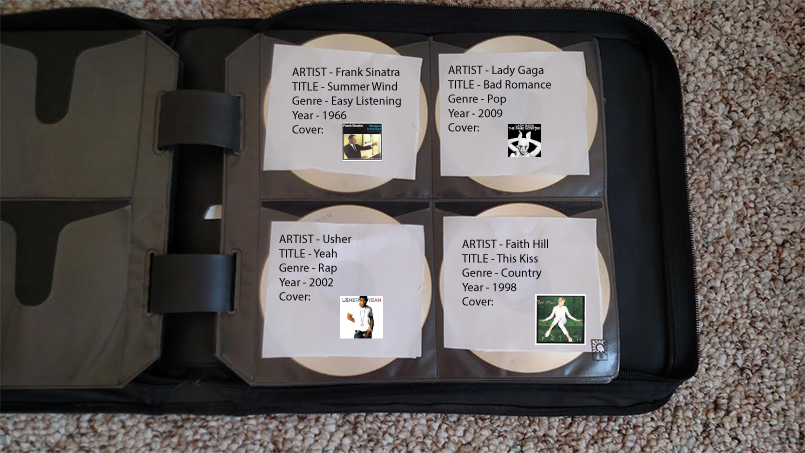
In the above example you’ll see all the data! And guess what!? That data is going to show up inside Jukebox Jockey beautifully! Here’s how the computer will read this.

Because in this last example we have complete and accurate tags, we will get no "unknowns" inside of Jukebox Jockey and we will be able to sort by Genre, Decade, and utilize the Album views. WIthout this information Jukebox Jockey has no way of knowing what's what.
Notice in the above example since the Track Number wasn't in the tag. It was however in the file mask. Jukebox Jockey will first read the file mask, then it will read the tag. If the tag has a value it will overwrite the data it found in the file mask with the tag information. In Jukebox Jockey (and most other applications) tags take higher precedence over file masks.
The Bottom Line... How to Tag
Tagging your files is usually done with a “tagging utility” but you can also tag most file formats inside Windows! To do it inside of windows just right click on the file and choose “Properties”.
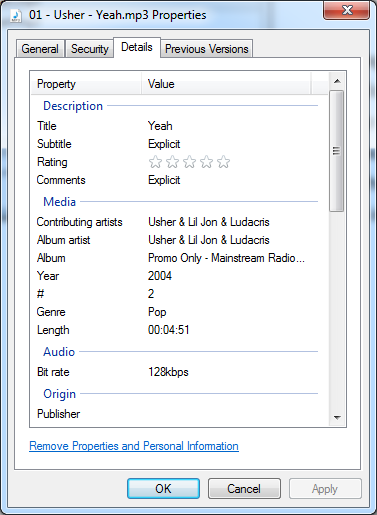
The only problem is that Window’s Tagging methods are very limited. There are a million different tagging utilities out there. These tagging utilities will give you the ability to pull file masks and insert them into the tags to get you started. And they have many other tools to help you tag in bulk (naming all songs from an album with a single artist name for example). I'll try to list them at the end of this post. The application that I know and use is called “Tag&Rename”. Here is the same example as viewed inside of this software.
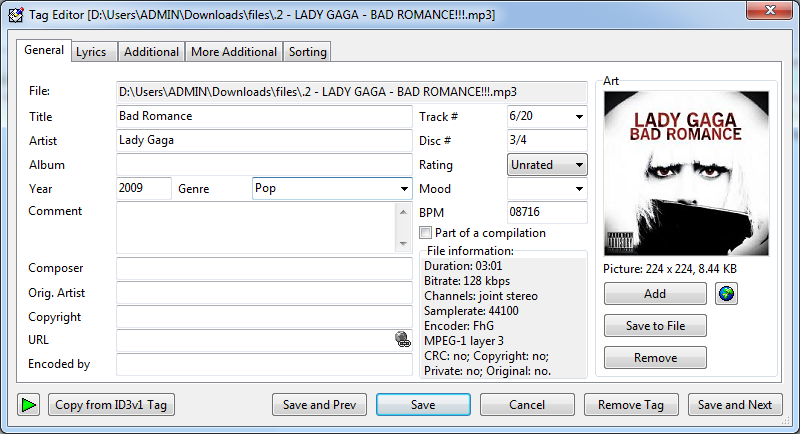
Use this tag editor to edit all of your tags and you’ll be sure to have the best Jukebox Jockey machine ever!
Tagging Utilities You Can Try
- Tag&Rename
- Mp3Tag
- & so many more, Google it!
